|
2018 "Revival" Project Page
4/22/18 - As
mentioned on the
previous page, the
606 was running badly, parked, and not touched for
many years. Before either scraping it or starting to
spend a pile of cash getting it field ready, the
first step was to see if it ran. My cousin Bud, an
excellent mechanic, stopped by one Saturday, told me
what to go buy (basically two 12V batteries, starter
fluid, and some "Diesel Kleen"), he came back a few
hours later, worked his magic, and when he left, it
was running better than when I bought it! |

What the tractor
looked like after sitting in the same spot for
years. |

Here is a close up of
one of the back tires that disintegrated and the
caustic ballast liquid leaked everywhere. |

New battery #1. |

New battery #2. |

New tires, mounted on
new rims, arrived via UPS from Tennessee! |

|
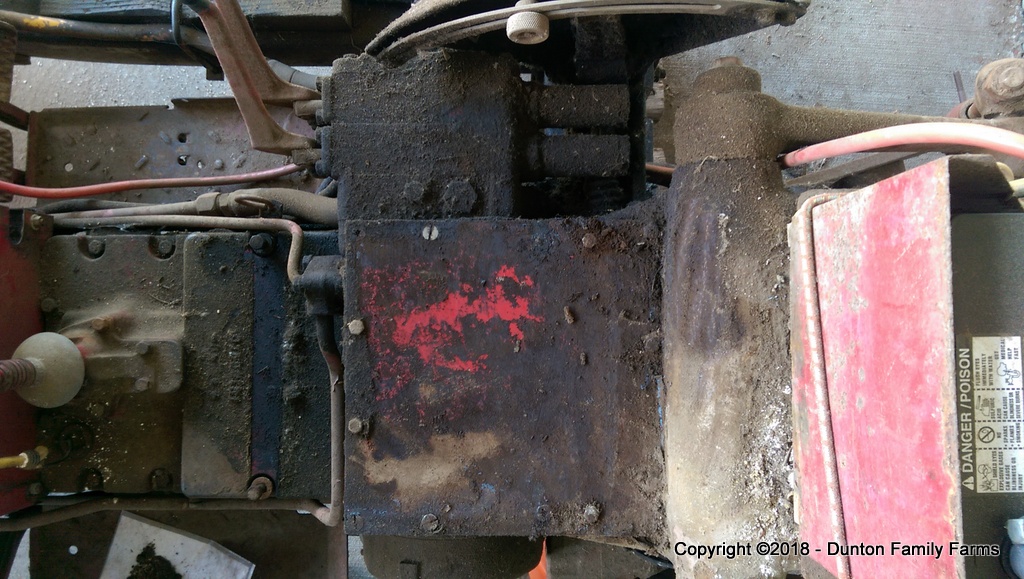
5/3/18 - Random
shots taken while assessing the work ahead. |
 |
 |
 |
 |
 |
 |
 |

Cracked front axle
shaft. |
 |
 |
 |

No muffler or stack
cover. This will be eventually remedied. |
|
|
 |
|
6/2/18
- As time permitted, and it is farming season so not
much spare time these days, I began breaking things
apart and cleaning them up. The first step was to
get the old tires and rims off of the tractor. Every
single bolt was rusted solid. Using cans of
penetrating oil, I muscled off some bolts, but
finally broke down and had the local mobile farm
repair truck from Les Schwab come over and for $100,
they were able to get 98% of the bolts off. These
included the ones holding on the wheel weights, the
hubs to the old rims, and the lug bolts.
|

For some reason,
someone had used extra long lug bolts to mount the
hubs to the axles. I suspect in an effort to protect
the threads protruding from the backside, they
installed nuts. All of these nuts and bolts had to
be soaked and fought off. |

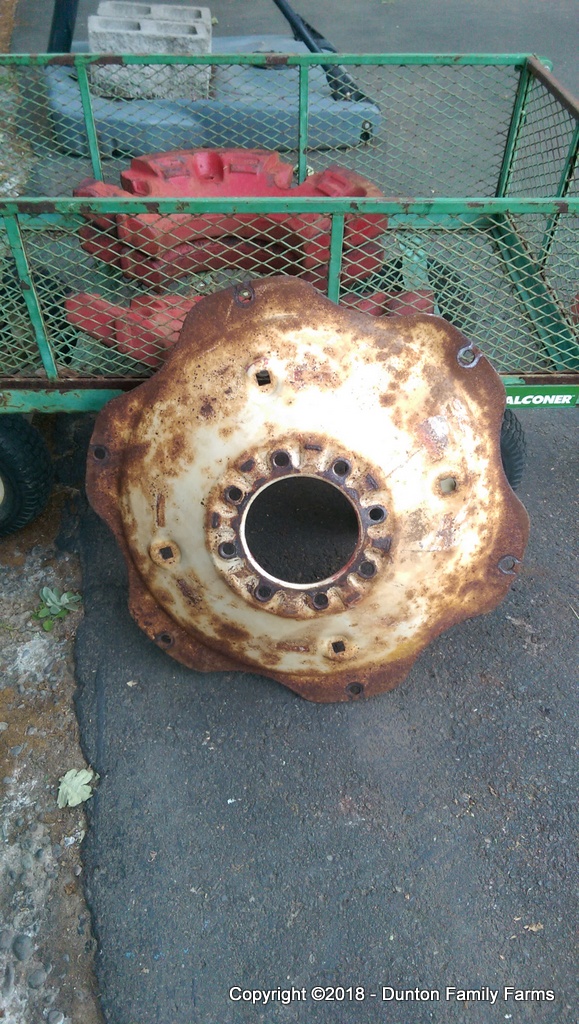
A recently freed up
rim. One of the wheel weight bolts on this one had
to be ground and cold chissled off! |

Pressure washed parts. |
 |

Cleaned up and primed. |

One done, one not so
much. |

Side view of the seat
after being removed. |

Bottom view. |

Back |

Front |

Peeking inside. |

The pieces. |
|
The
seat mess had me a bit puzzled as it looked nothing
like any of the available model. Finally I got it
off of the tractor, broken apart and figured out
that the original seat had worn out at some point in
its life and they had wedged some random tractor
seat cushion into the frame. Now that I knew what
seat model I had, the De Luxe, by the way, I got a
new seat back and bottom cushion ordered. |
 |
 |
 |

Looking down on where
the seat was installed |
|

Seat frame cleaned,
sanded and primed. |

Fiberglass seat back
prior to restoration work. |

Using John's white
vinegar trick to remove rust from nuts and bolts. |

Lug bolts cleaned up,
rethreaded, and heads primed and painted. |

Various wheel weight
and hub bolts. |

Shooting primer. |

Cleaning off rust with
wire brush (and a lot of skinned up hand parts). |

Cleaning up parts. |

I will paint these
later after degreasing the rear-end of the tractor
and paiting it all at the same time. |

Documenting part
numbers as I find them. |

Looking down on where
the left fender mounts. |

Another part number. |

Another part number. |

Capturing decal images
also. |

And where they are
located. |

I ended up breaking
down and buying a pile of new nuts, bolts and
washers to mount the hubs on the new rims. |

Inside of hub mounted
on a new rim. |

Outsie view of the
same. |

Close-up of the
specifications. |

Right tire mounted. |

Left one too. |

One last shot of the
tractor in it old home before firing it up. |
6/30/18
- It took a while,
pressure washing, wire brushing, grinding and
sanding, followed by priming and painting, but on
this day, I got the new rear tires mounted, fired the
tractor up on the first attempt, and drove it out of
the shed! It sure felt good! First thing I did was
to spray on a couple of cans of Gunk and hose off
the years of dirt and grime. The photos below are
just a few after it was cleaned up a bit. It is
still pretty grungy so a more thorough degreasing
and pressure washign will follow.
|
 |
 |
 |
 |
 |
 |
 |
 |
 |
 |
 |
 |
 |
 |
 |
 |
 |
 |
 |
 |
 |
7/7/18 - Clean
up continues ... In preparation for the new seat
cushions that I ordered on 7/3 to arrive (due on 7/10), I started work on the seat
components. The fiberglass back was awful. In the
past, while operating the tractor,
I would always have a rash on my forearms from the
exposed glass fibers. So I
sanded, used sanding sealer, primed, sanded more,
and finally painted. Oh, there was a decal on the
back so I masked it off to preserve it and when
done, removed the tape and shot it with clear coat.
|
 |
 |
 |
 |
 |
|
|
7/8/18 - The bottom of the air cleaner canister
had been dented up a bit and was rusted enough that
you could see daylight through it. I had a small can
of old Bondo left over from doing some body work a
couple of years ago and was able to ply it enough to
get the hardener mixed into it. Cleaned it up and
pounded it out as best as I could, shot the inside
with silver Rustoleum, and slapped a layer of the
Bondo on it. Will shape, sand, primer and paint it
next. |
 |
 |
 |
 |

Is that the Milky Way? |

Parts all taken apart,
washed and drying in the sun. |
 |
 |
 |
 |
 |
 |
|
While things were
drying, I continued working on the seat. I needed to
get the sliding rails off of the old seat cushion
bottom but the bolts were so frozen up (rusted
together), I ended up using the side-grinder and
removing them that way. |
7/11/18 - The seat cushions, and other assorted
parts, arrived from All State Ag Parts. Unfortunately,
they do not fit the 606 "De Luxe" seat frame as I was
assured in advance of ordering.
Click here for the seat
restoration page.
7/14/18 - I got the aircleaner bottom bowl shot
with paint. It still looks like a beat up, very used
part, but it is now relatively airtight and hopefully I
slowed down its decay.
7/15/18 - The tractor has been sitting in the
barnyard for a couple of weeks waiting for me to have a
bit of time to clean it up. Today I got the hood removed
and in the shop so that I can later straighten it out
and get it painted. After that I emptied three cans of
Gunk onto it and pressure washed the heck out of it.
When Bud has the tractor, I will get him to pull off the
old steering wheel and loosely install the new one so
that I can take apart the dash, cleand and repaint, and
install the various new parts that I ordered.
7/16/18 - I chatted with my mechanic cousin
letting him know that I had gotten the tractor
degreased, all of the filters and fluids together, and
that it was ready to be picked up. I actually do still
need to get the air cleaner assembly all put back
together, make a list of everything that I know needs to
happen, and to actually get all of the fluids and
filters into one location and ready for pick up.
7/18/18 - I heard back from the customer service
person from All States Ag Parts regarding the seat. I
ended up foregoing the idea or finding replacement
cushions and rebuilding the stock 606 seat. He said that
it was only used on the 606s and that IH
cross-referenced the old part number to the cushions
that I returned. The solution was to buy the 706/806
three cushion seat components (hardware and cushions)
for $176 and making that seat work. It should be here
next Wednesday.
7/19/18 - Been working on getting the farm
prepared for a wedding this coming weekend but carved
out some time today to work a bit more on the air
cleaner assembly.
|